
Focus Stacking
 Focus stacking is one of the photography technique used, most of the times, for macro photography. This technique is useful if one wants the background to be totally out of focus with the main subject in sharp focus. This makes the main subject stand isolated totally and draws viewers' attention. The images can be more creative with varied skill of an individual. If the distance between the main subject and the background is more, one need not use stacking. The depth can be controlled using the proper aperture of the lens. On the other side, if the background is too nearer to the main subject and one needs it to be isolated, focus stacking is the way.
The technique involves taking several shots of the subject with exactly same framing with varying focus points and merging all together using a software called 'CombineZM'. Each shot will have different focus points with very shallow depth of field. The selection of the depth depends on the camera, lens, subject, lighting etc… A tripod is essential as the frames are not supposed to be disturbed. While composing the frame for focus stacking, leave some free space around the subject. This is required because, after the stacking there will be some weird mirror patches at the edges of the frame and have to be removed. This makes the final image more appealing. Avoid focusing on the elements in the frame which contradict the software during processing.
Once several shots are taken, the images can be post processed for one's likings, keep the contrast a little bit higher as the image after stacking comes out a little bit dull if the frames are less contrasty. Take care to maintain the similar post processing on all the shots.
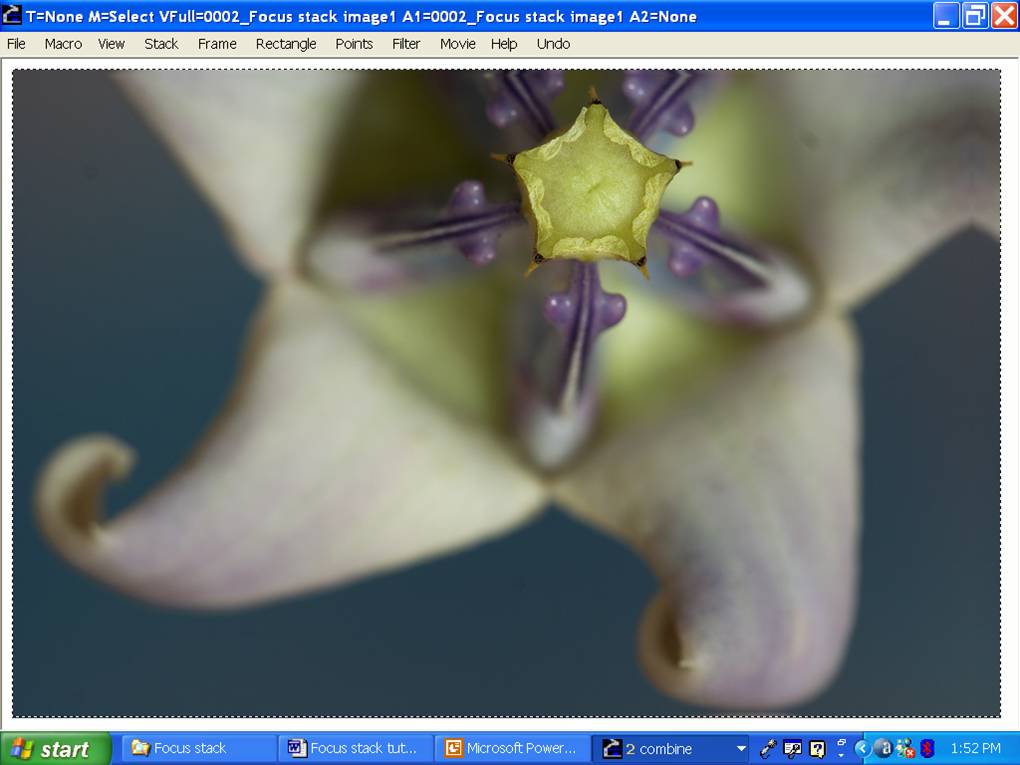
Here are two images of the same subject which are used for explaining the technique.
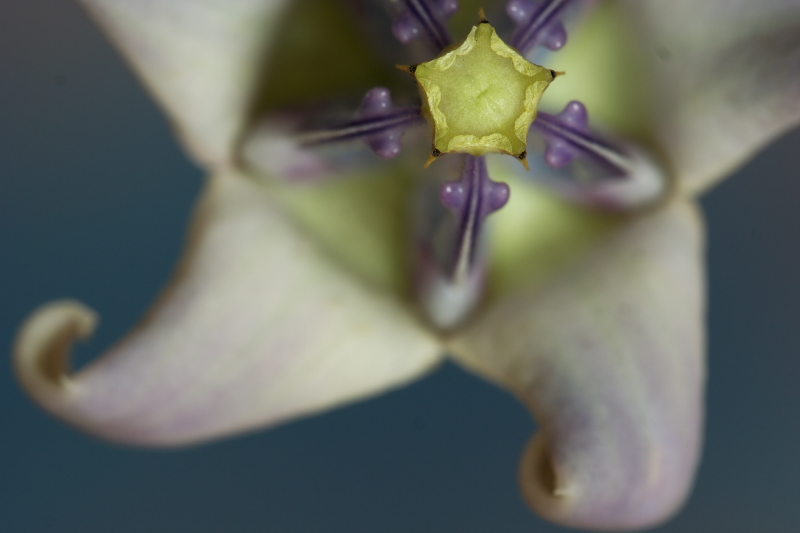
In this image, only top part is focused and below that part, the subject is out of focus.
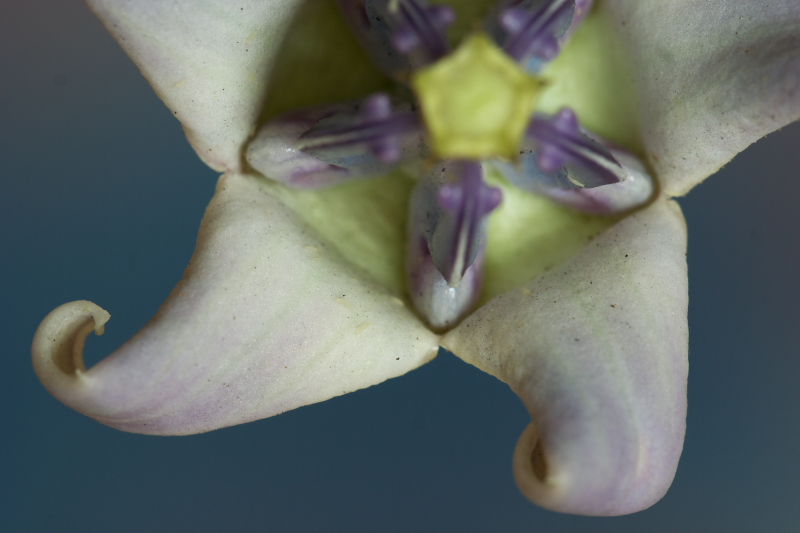
In this second image, as you can see, the bottom part is focused and top part is totally out of focus. You can observe that in both the images, the background is smooth and gives a good appealing look.
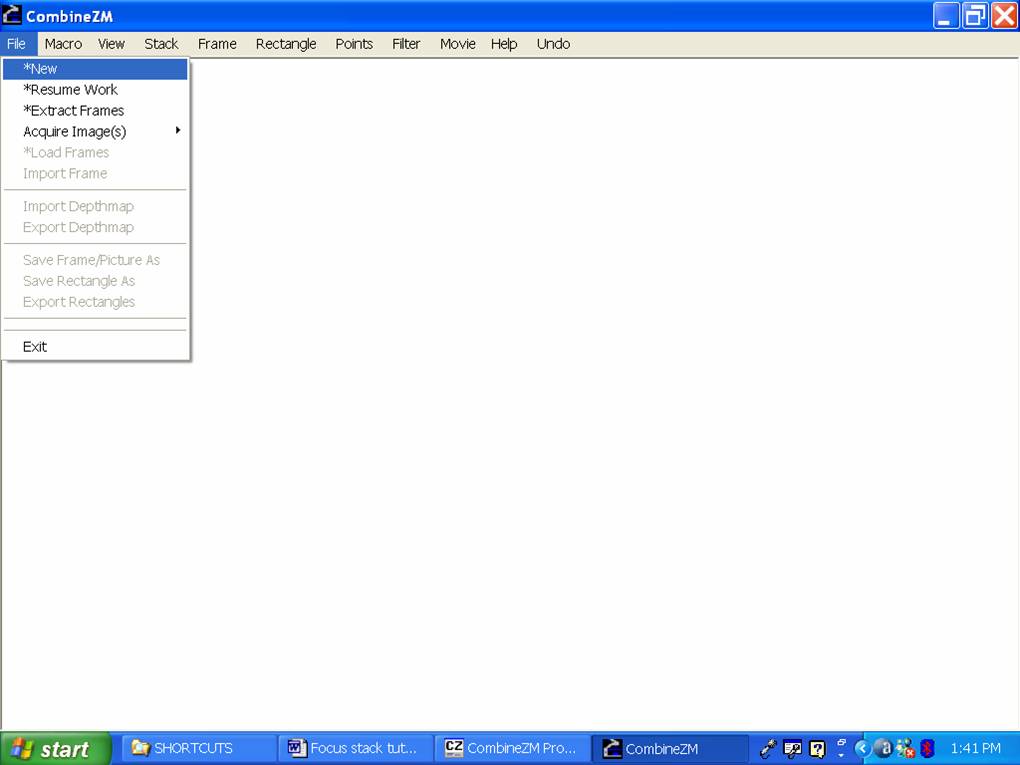
Once the basic images are ready, open the software 'CombineZM' and follow these steps.
- Go to 'File' menu and select 'New'
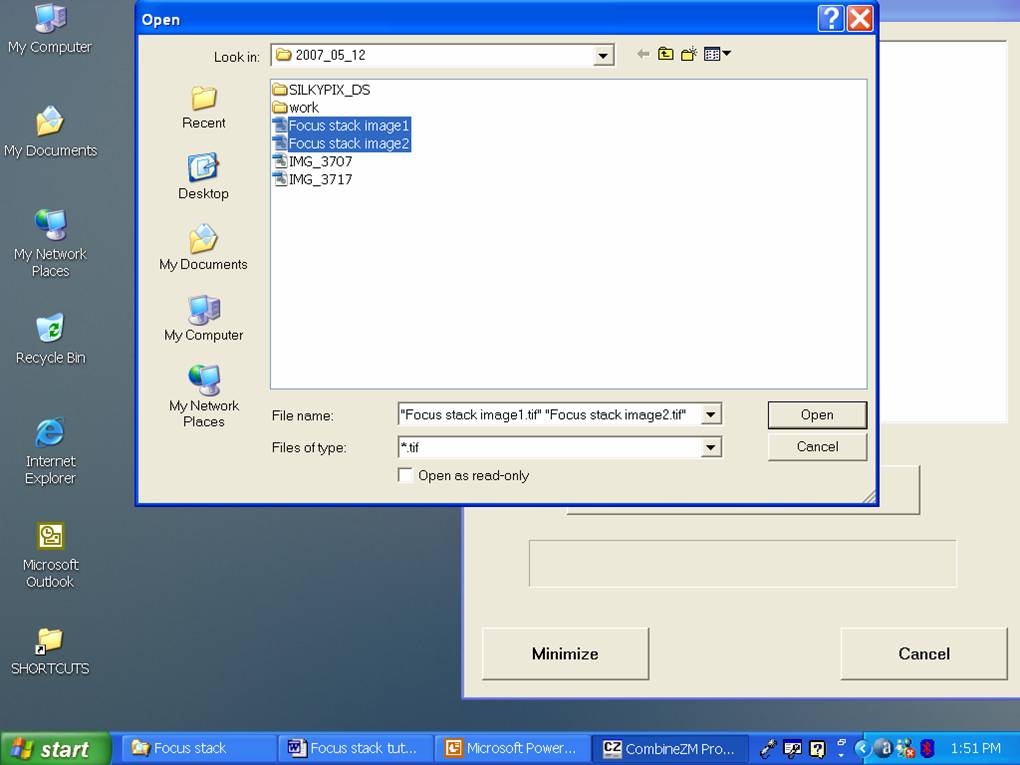
- The window shown below appears and select the images together (use shift or ctrl key and mouse button to select the multiple images) and press open.
- The files are read by the software (takes a little bit of time to read) and the first image will be shown on the monitor along with the menu items.
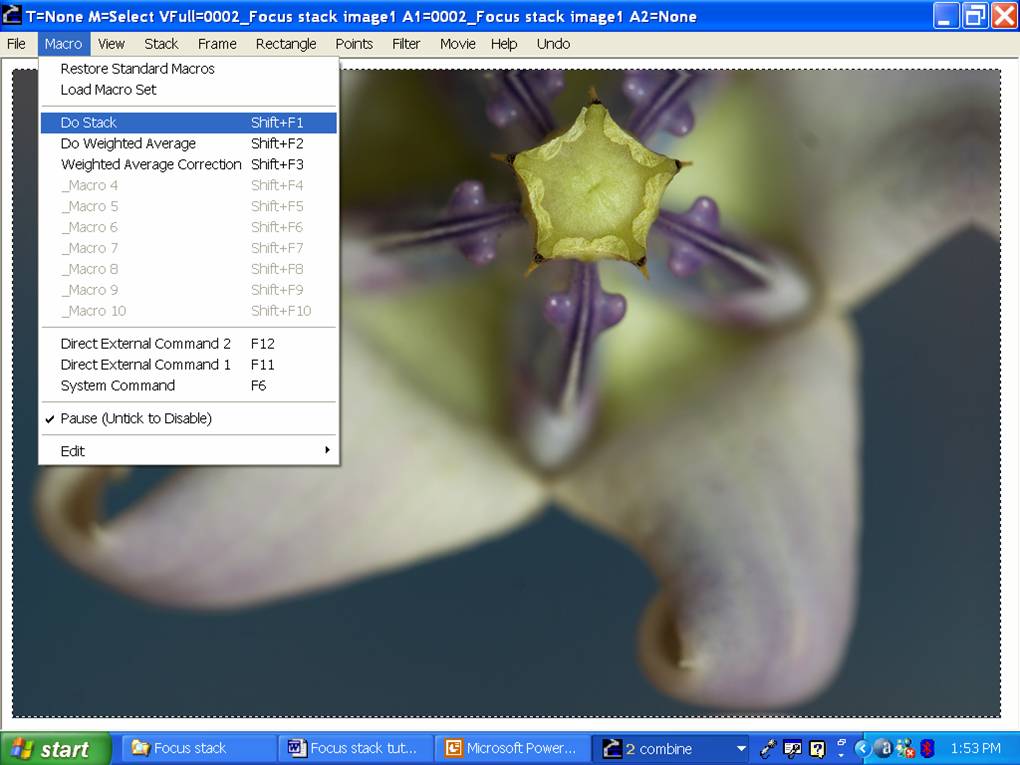
- Now go to 'Macro' menu and select 'Do stack' or press 'Shift+F1'
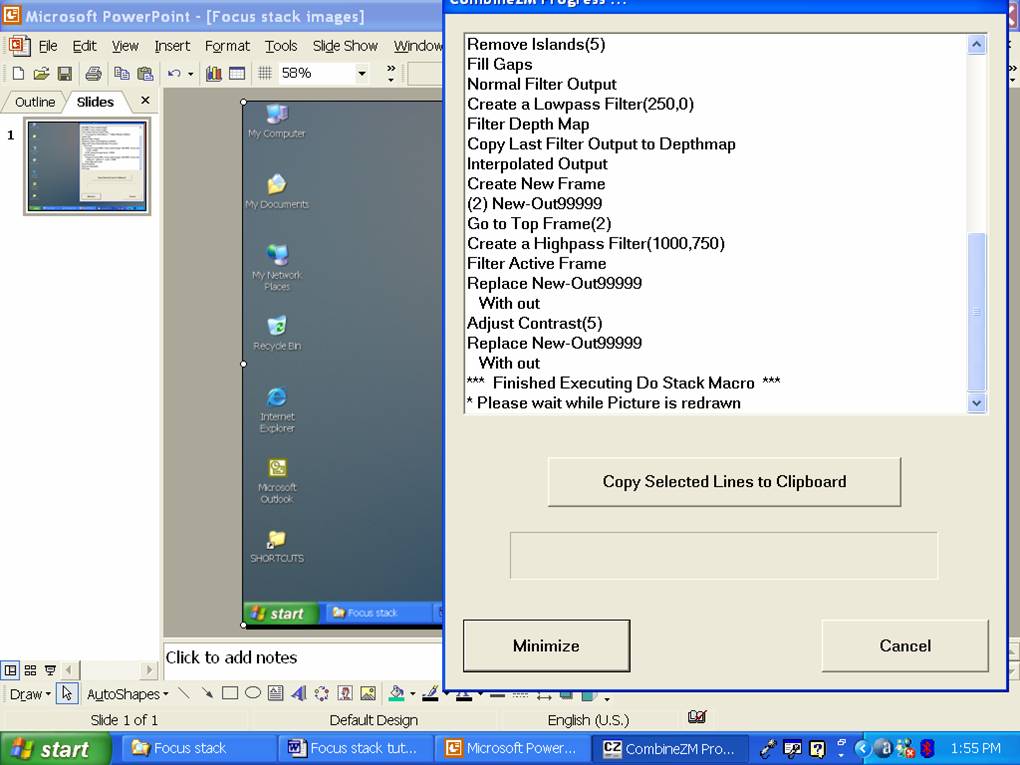
- The software goes through several phases and be patient … finally a message comes on the window informing 'finished executing do stack macro' and the final image will be redrawn on the screen
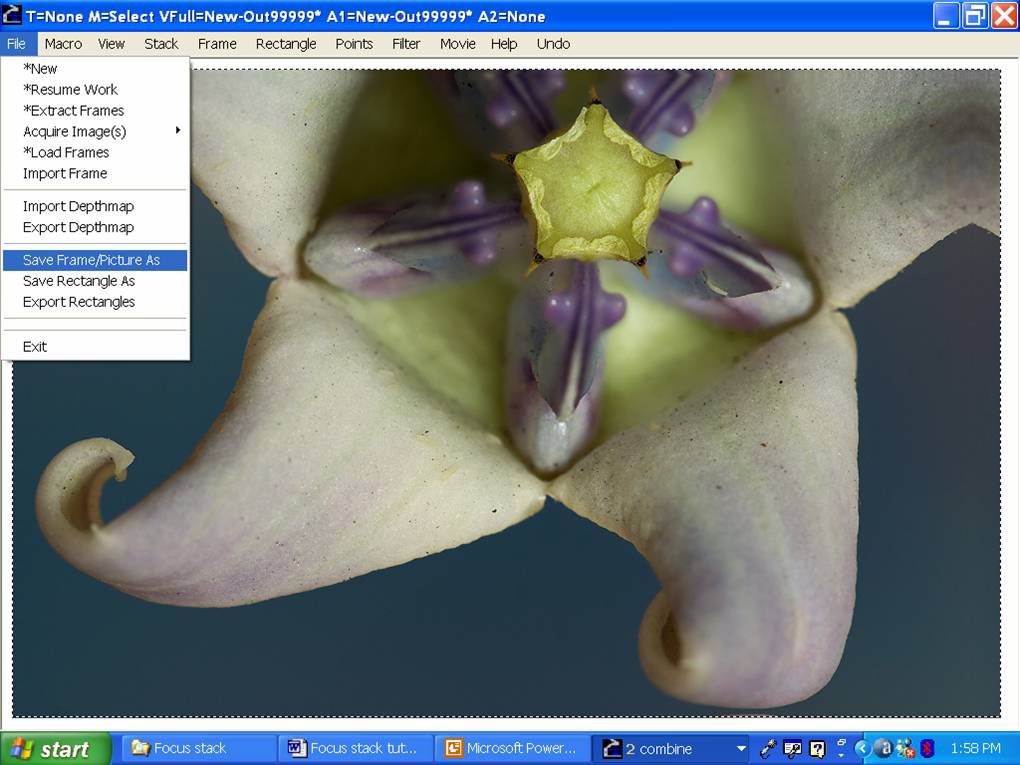
- The resultant image has to be stored. Go to file menu and select 'save frame/picture as' option. The image can be stored in several form. Select the required option, directory and file name and save the file.
- As it was mentioned earlier, the resultant image may have some mirror patches as shown below.
- Here is the final image after removing those patches and with some Post processing. Sometimes, at the edges of the final image, there will be some distortion, that is to be removed (cloning) during post processing.


Your Rating
Tweet